Automating Container Recommendation
The Kubex Automation Engine provides intelligent, policy-driven automation for managing container resource configurations in Kubernetes clusters. It safely and efficiently optimizes workload resources based on Kubex’s optimization recommendations while respecting your operational constraints.Key Features
- Automated Resizing: Dynamic CPU and memory optimization based on actual usage patterns
- Zero-Downtime Optimization: In-place container resizing without pod restarts (Kubernetes 1.33+) with automatic fallback to pod eviction
- Safety-First Approach: Multi-layered validation that is HPA-aware, enforces LimitRange and ResourceQuota policies, respects PodDisruptionBudgets, and validates node capacity before applying changes
- Smart Pause Control: Annotation-based pausing for learning periods after application changes or applying permanent exclusions
- Policy-Driven: Configurable automation rules for downsizing, upsizing, and constraint handling
- Flexible Targeting: Multiple scope configurations for different automation behaviors across cluster regions
- Enterprise Ready: RBAC integration, audit trails, and GitOps compatibility
Getting Started
Use the Helm chart to deploy the Kubex Automation Engine Helm Chart.Monitoring Automation Activity
If you need to confirm which clusters have automation deployed—or check the health of those deployments—open the Automation status page for detailed telemetry and recent change history. The Container Overview Summary page shows how many container manifests are currently enabled for automation and how many have been actively automated over the past 7 and 90 days. Each metric is interactive—clicking any of the numbers drills into the filtered list of containers that make up that count so you can review the specific workloads behind the summary.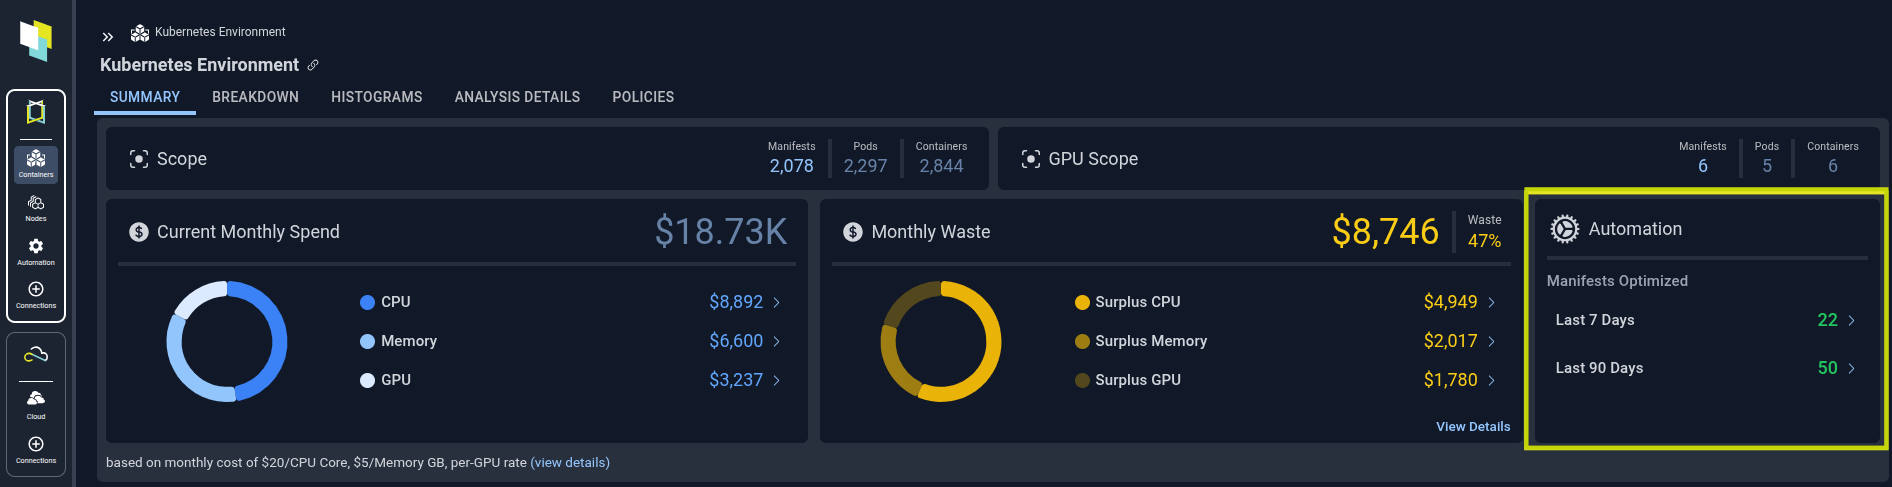
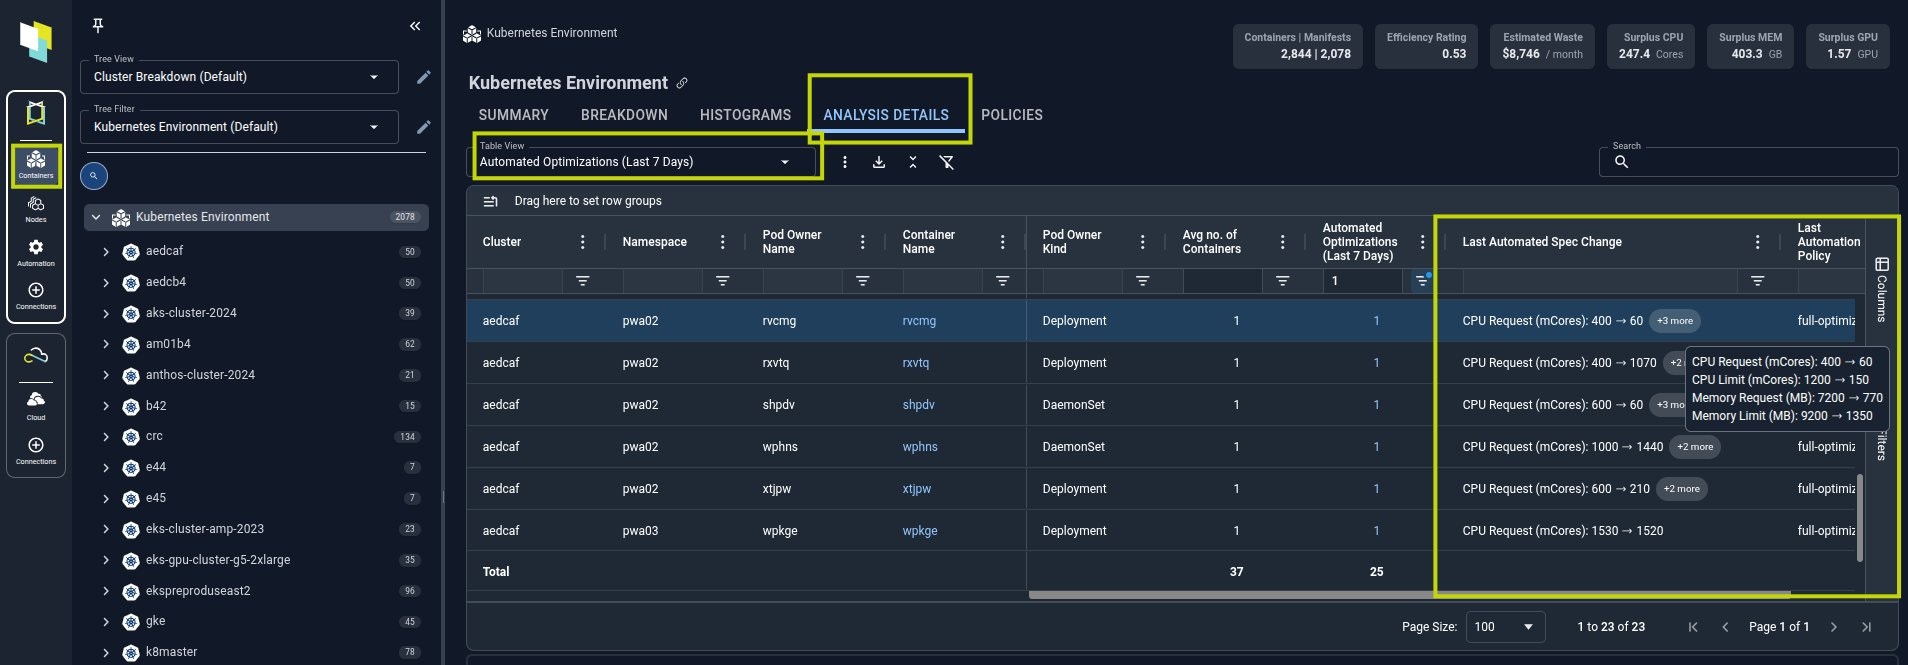
Selecting the Last 7 Days count drills into the detailed container list shown below. This view represents only new optimizations applied in the last week—it excludes pods that are simply maintaining an older recommendation.
The Last Automated Spec Change column captures the most recent resource change Kubex made; if a metric is not listed, it was either already at the desired configuration or the current policy is not configured to resize that dimension.
Selecting the Automated Optimization count also opens a modal with the full history of new optimizations performed on that workload. Each row represents a distinct automation event; clicking a row updates the CPU and Memory utilization charts beneath the table so you can zoom into the exact date and time of that change. Use the table view switcher to expand beyond the default 7-day window and review the last 90 days or the entire duration since automation was enabled.
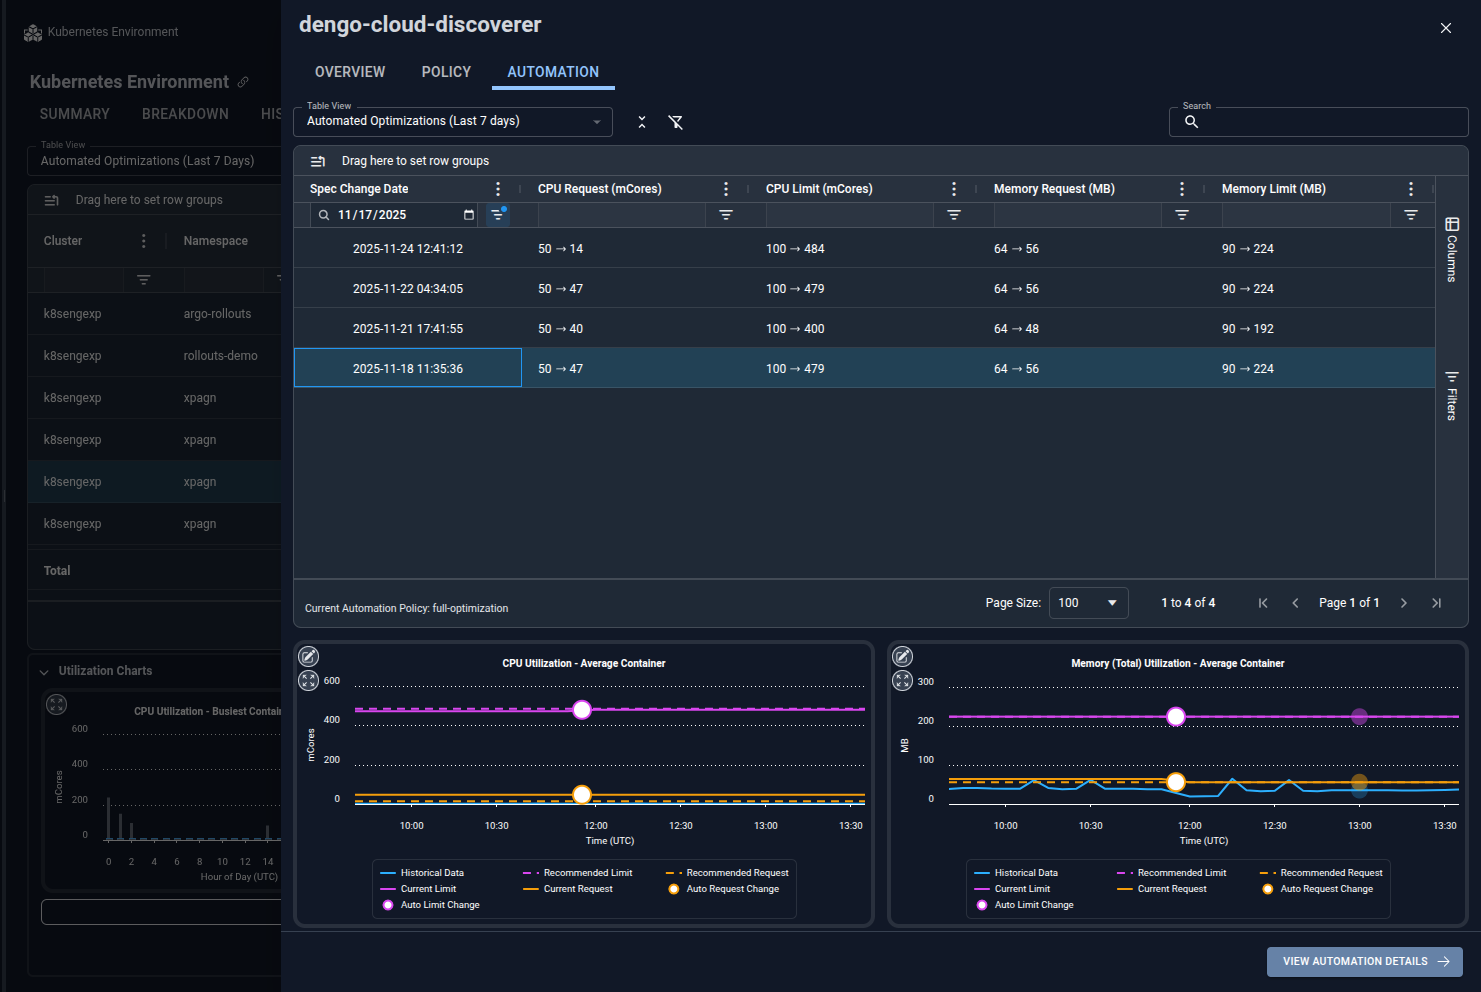
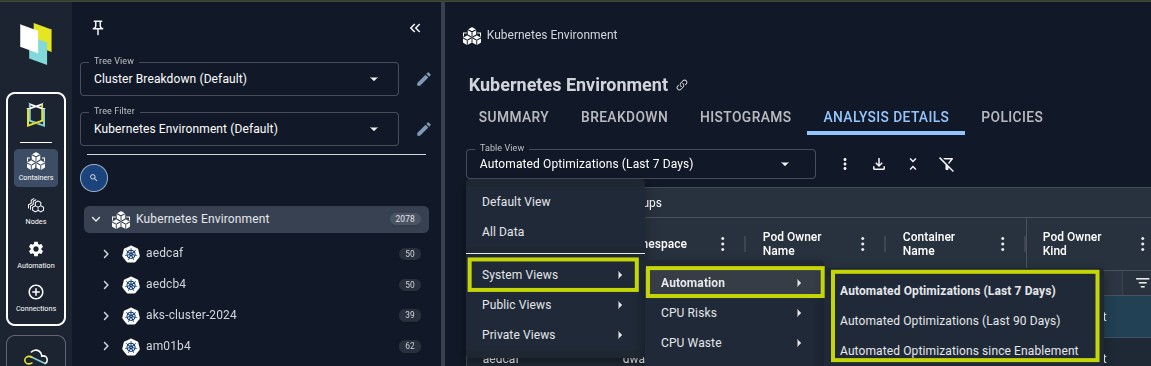
Use the table view selector to swap the metrics from the automated optimizations from last 7 days view to the last 90 days or the full duration since automation was enabled. This lets you validate both short-term activity and long-term adoption without leaving your page selection.
Automation Policies and Configuration
Automation policies define how the Kubex Automation Engine optimizes your workloads. These policies are configured through the Helm chart values and determine which resources are automatically optimized, under what conditions, and with what constraints. Creating Automation Strategies and Policies:- See the Configuration Reference for complete details on policy structure, targeting rules, and optimization strategies.
- The Advanced Configuration Guide covers safety controls, pausing automation, and advanced deployment scenarios.